Wednesday, January 13, 2010

Red-braised beef

IMG_12581 by you.


I actually made this a couple weeks ago, for New Year's Day, but I haven't had a chance to post about it till now.  Chinese "red-braised" beef is one of my ultimate comfort foods.  My grandmother use to make the best I have ever tasted, although my mom's is pretty darn good too.  I had my grandma teach me how to make this and a few other favorite dishes a number of years ago, following her to the grocery store and attempting to keep track of her measurements.

It's basically a large, tough cut of beef braised in a mixture of soy sauce and other liquids until tender.  The soy sauce is what gives it the "red" color (although some will argue it's really brown, but whatevs).

Even with a pressure cooker, this dish is pretty time-consuming, so it's best cooked at least a day ahead of time.

Ingredients
3-6 lbs beef boneless shank or chuck (or combination of the two), left in large pieces
1 lb beef tendon (optional)
1/2 c. soy sauce
1/4 c. dark mushroom soy sauce
1/4 c. Chinese rice wine (can also substitute mirin or even whisky in a pinch)
 3-4 cloves garlic
3 scallions, cut into 3-4 pieces
4-5 whole star anise pods
1/2 tsp whole Szechwan peppercorns
1/4 tsp black peppercorns
Up to 1/2 c. water, as needed


Directions
1. In a large pressure cooker, add all ingredients.  If you like, you can tie up the star anise and peppercorns into a small sachet of cheesecloth or put them in a tea ball to make it easier to fish them out later.  However, you'll be straining the liquid at the end, so it's not completely necessary.  The liquid in the pot should come about halfway up the level of meat.  Add water, as needed, but try not to add more than 1/2 cup.

2.  Close the lid and heat according to you pressure cooker directions.  Pressure-cook for 1-2 hours, until meat is very tender, almost (but not quite) falling apart.  If you're also using the tendon, that may take longer, so you may need to remove the meat and keep cooking the tendon separately.  Alternately, if you don't have a pressure cooker, you can do this in a large Dutch oven over low heat for 3-4 hours.

3. Once everything is cooked, separate the meat & tendon from the liquid, and then strain the liquid into a large measuring cup or bowl.  The amount of liquid you end up with vary, but I yielded roughly a quart of liquid from 6 lbs of meat.  You will likely have much less if you did not use a pressure cooker.


IMG_12491 by you.


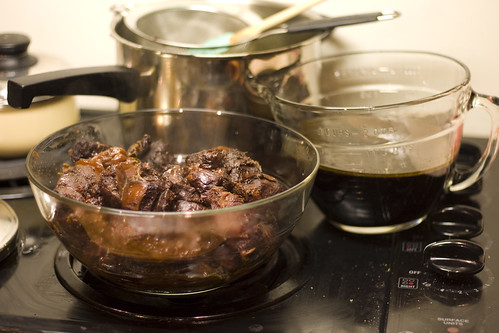
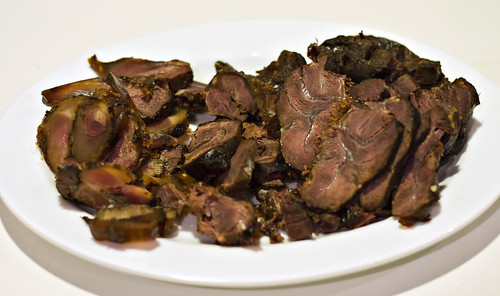
4. If you have the time, cool the liquid down in the refrigerator or freezer until the fat separates and solidifies.  Skim this fat off and discard.The meat and tendon is also much easier to handle if you allow it to cool for several hours, covered, in the refrigerator.  I usually wait until it is cooled, cut only what I'll need into 1/4-1/2 inch slices, then reheat.

Here's a pic of the meat and tendon, after it has been sliced.

IMG_12568 by you.

 The meat and liquid also freeze well separately.  My mom used to freeze the liquid in plastic storage containers and then transfer the blocks to ziploc bags. Once defrosted, it makes for a quick easy dinner.


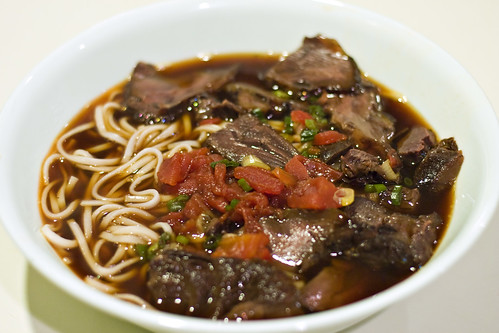
Once your meat is cooked, there are a number of different things you can do with it. The most common is to make beef noodle soup by take the cooking liquid and turn it into a broth, and then adding beef and noodles.  It's sort of like Vietnamese pho, but with different flavor profiles.

To make the broth, pour 2 cups braising liquid into a large stockpot.  Add 1 quart of low-sodium chicken stock (I use Pacific Natural Foods organic chicken broth).  Don't worry, the liquid has plenty of beef-y flavor and you'll never know the difference.  Add one can of diced tomatoes (liquid and all), and bring to a boil.  Add about 1/2 cup of chopped scallions just before turning off the heat.  You can also add napa cabbage or fresh spinach to the soup, if you want to get a little veg in there.

To serve, place your desired amount of freshly boiled Chinese noodles and sliced meat in a large bowl.  Ladle the hot soup over it and eat immediately.

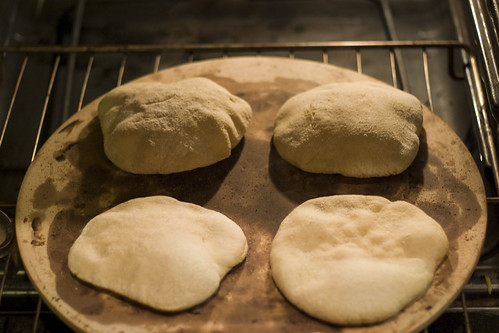
You could also make green onion pancakes and serve the meat with that.  I've previously posted the recipe on my other blog.

Notes
I know that 3-6 lbs of meat sounds a bit broad, but it's the same amount of work to make 3 lbs as it is to make 6 lbs, so it doesn't hurt to make extra and freeze half. I usually cook somewhere around 3-4 lbs of meat.  I realize that still sounds like a lot, but it does cook down quite a bit and we don't mind leftovers around here. ;)  This was the first time I made 6 lbs because I was feeding six people instead of three, and we definitely had plenty to spare.

Also, I'm sure a lot of you read "tendon" in the ingredients list and made a face.  But honestly, that's probably my favorite part of this dish.  It's definitely not for everyone since the texture, once cooked, is fairly gelatinous, but if you can get past that, it's really fabulous. You'll more than likely have to go to an Asian grocery store to find it though.  In the past, I've gone to meat markets and asked about it only to have butchers look at me all cross-eyed.

As for the other cuts, I also bought large, 2-lb pieces of beef shank at the Chinese grocery store, but if you can't find those, the smaller, bone-in cross cut pieces you find at the regular grocery store will work.  Or a large chuck roast is good too.

Tuesday, January 12, 2010

Whole-Wheat Pita Bread


IMG_12608 by you.


I randomly decided I wanted to try to bake some pita bread today.  Well, not totally randomly.  I actually wanted to make naan, but as I was searching through The Bread Bible by Beth Hensperger for a recipe (sadly to no avail), I came across this recipe for Country-Style Whole-Wheat Pita Bread and decided to try that instead since I already had all the ingredients for it.

Ingredients
2 1/2 c. warm water (105-115 degrees), divided
1 Tbsp (1 packet) active dry yeast
pinch of sugar
1/4 c. olive oil
1 Tbsp salt
3 c. whole-wheat pastry flour
3-3 1/2 c. unbleached all-purpose flour

Directions
1. Pour 1/2 c. warm water in a small measuring cup, and sprinkle in yeast & sugar.  Stir to dissolve and let stand until foamy, 5-10 min.

2. In a bowl of a stand mixer, combine whole-wheat flour, salt, olive oil and remaining 2 c. of water.  Mix on med-high with the paddle attachment until creamy, about 1 minute.  Stir in yeast mixture.

3.  Add the all-purpose flour, 1/2 cup at a time until a soft shaggy dough that just clears the sides of the bowl is formed.

4. Switch to dough hook and knead for 2-3 minutes, or until the dough is smooth and springy and springs back when pressed.  Or if you prefer, transfer the dough to a floured surface and knead by hand.  Dough will be very soft.

5. Place the dough in a lightly-greased, deep container or bowl.  Turn the dough so that it is coated with oil on all sides.  Cover with plastic wrap and let rise at room temperature until doubled in size, about 1-1 1/2 hours.

6. Preheat the oven to 475 degrees with a baking stone set on the bottom rack. Line several baking sheets with parchment paper, or heavily flour a pizza peel.

7. Gently punch down the dough and divide it in half.  Keep whatever dough you are not working with covered with plastic wrap or a clean towel to prevent a skin from forming.  Divide each half into 8 equal portions and form each into a ball.  Let rest 10 minutes while dividing the second half of the dough.

8.  Dust the work surface with whole-wheat pastry flour.  Using a rolling pin, roll the balls into 6-inch circles about 1/4-inch thick.  Loosely cover the circles and let rest 15 minutes, or until puffy.
Do not stack, as they will stick together.  If the dough does not roll out easily, let it rest for 10 more minutes to relax the gluten.  Move the dough circles by draping them, one at a time, over a flour-dusted rolling pin and place them on a floured dish towel before transferring them to the peel or baking sheets.

9. Transfer the circles to the peel or baking sheet.  With a quick action of the wrist, slide the pita rounds from the peel directly onto the hot stone.  You should be able to fit 4 at once.  Or alternately, place the baking sheets (one at a time) on the bottom rack directly on the hot stone.  Do not open the oven door for a full 4 minutes.

10.  Bake 8-10 minutes, total, or until fully puffed and light brown.  Watch carefully that the pitas do not overbake or burn.  The baking sheet pitas will take longer to bake than the stone-baked ones.  Remove the puffed hot breads with a wide metal spatula and stack between clean dish towels.
Makes 16 pitas.


IMG_12615 by you.


Notes
These were fantastic, especially right out of the oven.  My daughter wolfed down a whole one by herself, plain. 

I made this recipe pretty much exactly as written - don't ask me why I happened to have whole-wheat pastry flour on hand, I have no idea.  Also, I'm not sure why she says to use one package of yeast or 1 tablespoon - I've always been under the impression that at package of yeast is 2 1/4 tsp (so 3/4 tsp shy of a tablespoon), but I went with the tablespoon measurement.  Which reminds me to mention something: if you make bread or pizza dough or anything with yeast even semi-regularly, it's really in your best interest to just buy a jar of active-dry yeast instead of the packets.  It's WAY cheaper.

However, when I baked the first few, I had missed the step of letting the rolled-out pitas rest 15 minutes so they did not puff up.  They still tasted great, they just didn't have pockets in the middle.  All the subsequent ones turned out fine.

I also forgot to set my timer for one batch and I think I horribly overbaked them, but after cooling a bit in the dishtowel, they were fine.  I will say, with the whole-wheat flour, it's a bit difficult to tell the doneness by color, as advised in the recipe.  But I really liked the flavor the whole-wheat flour added.  I think using the pastry flour was key - a lot of regular whole wheat flours I've used before tend to be coarser, which would definitely have affected the texture.


A few warnings:
1. You're going to need a lot of open surfaces or counter-space to do this.  Even if you don't roll them all out at once, you'll probably have 4-8 pitas sitting around and resting at any given time before being baked.
2. You will more than likely end up with a fine layer of flour covering most of your kitchen.
Neither of these things was a big issue for me, but I just thought I'd put it out there.
3.  I'm not sure I'd bother to attempt this recipe without the baking/pizza stone.  I know it seems like a pain to get one, but it's really a wonderful tool.  It makes even store-bought frozen pizzas taste worlds better.  You can usually find them for $10-$20 and they are worth every penny.

Oh also, the author did have a note in her recipe that these stale rather quickly, but toast nicely, so you may want to freeze a bunch if you don't think you'll use them all in the next few days.  After cooling them completely while still wrapped in towels, I put them in two ziploc bags, and I'm going to freeze one bag for later.  I'll update with how well they freeze & reheat when I get a chance.

Or alternately, she suggests you make pita chips with them:
Brush both sides with olive oil, cut each round into wedges and place in a single layer on a baking sheet.  Bake in the center of a 300-degree oven for 7 minutes, turn once and cook for another 7 minutes.  They will crisp as they cool.

Thursday, January 7, 2010

Hot pot


IMG_12597 by you.

I've been making fun of the dire weather warnings for the ARCTIC BLAST all week, but I have to confess, it really did get pretty dang cold!  I thought I moved to Texas to get away from phrases like "wind chill," dammit!

In any case, the cold weather was a nice excuse to fire up the camp stove and eat hot pot (huo guo), also known as shabu shabu.  I have very fond childhood memories of sitting around the stovetop on our kitchen island and eating this on cold, wintry nights.  I actually did a post about it last year on my other blog, but here are a few pics from tonight's dinner.

IMG_12593 by you.


IMG_12598 by you.


Tonight's version included eye of round, shell-on shrimp, fish & shrimp balls, napa cabbage, spinach, fried tofu, enoki & shitake mushrooms, and daikon radish.  I also had mung bean thread noodles soaked and ready to go, but we were so full by the end that no one could eat any.

Saturday, January 2, 2010

Chocolate-Sour Cream Bundt Cake


 IMG_12511 by you.


Have I mentioned that I love the new bundt pan I got for Christmas from my lovely sister-in-law?  It's not often that I will bake twice in the same day, let alone using the same pan, but I couldn't resist trying out the recipe that came on the back of the box last night.

You can also find a slightly different, scaled-down version of this recipe on the Williams-Sonoma website that's geared towards fitting a 10-cup pan.  It leaves out the chocolate chips and uses a glaze in lieu of ganache. I think it's probably pretty close to this recipe, but having never made it, I can't vouch for it.


Ingredients
1 c. non-alkalized cocoa powder, sifted; plus more for dusting pan
7 1/2 oz. semisweet chocolate, finely chopped
1. c boiling water
2 1/4 c. all-purpose flour
1 1/2 tsp baking soda
1 1/4 tsp kosher salt
2 1/2 sticks unsalted butter (room temperature)
2 1/2 c. packed light brown sugar
5 eggs, lightly beaten (room temperature)
4 tsp. vanilla extract
1 1/2 c. sour cream (room temperature)
1 1/2 c. semisweet chocolate chips

Directions
1. Preheat oven to 325 degrees.  Grease a large bundt pan and dust with cocoa powder, tapping out excess.

2. In a small bowl, combine the cocoa powder and 7 1/2 oz chocolate.  Add boiling water and whisk until the chocolate melts and the mixture is smooth.  Set aside to cool.

3. In a separate bowl or over parchment paper, sift together flour, baking soda and salt.

4. In the bowl of a stand mixer, cream the butter and sugar together until light and fluffy.  Add the eggs a little at a time, stopping occasionally to scrape down the sides of the bowl.  Add vanilla and beat in.

5. On low speed, alternately add the flour mixture and the sour cream in 3 parts, beginning and ending with the flour, beating until just combined.  Slowly pour in the chocolate-cocoa mixture and beat until no white streaks are visible, occasionally stopping the mixer to scrape down the sides and bottom of the bowl.  You want to mix until no white streaks are visible.  Then, using a rubber spatula, gently fold in the chocolate chips.

6.  Pour the batter into the prepared pan, spreading the batter so that the sides are about 1-inch higher on the sides than in the center.  Bake until a toothpick or skewer inserted in the center comes out mostly clean, approximately 60-70 minutes.

7. Transfer the pan to a wire rack and let the cake cool upright in the pan for 15 minutes.  Invert the pan onto the rack and lift off the pan.  Let the cake cool completely, at least 1 hour.

Notes
This recipe makes a LOT of batter.  Seriously, a crazy amount.  Like, it filled most of my mixer bowl, most of my 15-cup bundt pan, and puffed up and over it during baking.  You either need to have a BIG bundt pan to make this, or be prepared to make cupcakes on the side.

I made a few very minor changes.  I didn't have enough cocoa powder left to dust my pan, but it didn't end up being an issue since my fancy new pan is still super nonstick.  I did, however, substitute white sugar for a cup of the brown since I ran out.  And I used regular old table salt instead of kosher, which I find to be a pain to measure as accurately.  The original recipe also called for you to return the cooled cake back to the pan so that you could "gently saw off" any excess than extended over the edge of the pan and have a level bottom, but honestly, I didn't bother.

Also, when it says to scrape down the sides (steps 4 & 5), make sure you do a thorough job.  I thought I had, but when it came time to pour the batter into the pan, I found a pool of batter at the bottom that had not been mixed properly with the chocolate mixture.  If this ever happens to you, you basically have two options.  If you've already poured most of the batter out, just leave it.  Mixing it in now is only going to make your cake all streaky and weird.  Otherwise, you can try to mix it in with the rest of the batter by hand.

The original recipe also called for a ganache topping (6 oz chopped semisweet chocolate, 2 Tbsp unsalted butter, 1/2 c. heavy cream; heat cream to boiling and pour over butter & chocolate, whisking until smooth), but it really doesn't need it.  It is probably one of the most insanely chocolate-y cakes I have ever baked or eaten in my life.  The combination of cocoa powder, melted chocolate and then chocolate chips too bordered on unnecessary, and coming from me, that's saying something.  I think next time I may use mini-chocolate chips or leave them out altogether.


IMG_12515 by you.

All in all, this earned raves.  It was rich, moist, super chocolatey and delicious. We all ate the cake with a generous scoop (or two) of vanilla ice cream to cut the intensity a bit.  SO good.  In fact, this might be my new favorite cake recipe.  But like I mentioned before, it's enormous, so you may want to save it for really special occasions or large gatherings.

Friday, January 1, 2010

Monkey Bread, Take 2


IMG_12473 by you.

Happy New Year!!

For New Year's Day breakfast, I decided last minute to give Monkey Bread another try, this time using the shortcut that seems to be most popular, store-bought dough.  I actually happened to have a tube of refrigerated French bread dough on hand (bought for some other recipe that I never got around to making), so I opted to use that over biscuit dough.  But it was otherwise the same basic methodology: cut dough into small pieces, dip in a mixture of 1 c. melted butter, 1 1/4 c. brown sugar, 1 tsp cinnamon and 1 c. chopped pecans, toss in a bundt/tube pan and bake.

This time I used the brand-new Nordic Ware Nonstick Bundt Pan I got for Christmas and wow, what a difference that made!  For one thing, there was no burnt sugar all over the bottom of my oven, like last time (haha).  Seriously though, this pan is awesome.  Despite having gooey molten sugar in it, it pretty much unmolded the bread instantly and rinsed clean.  I'm pretty much a total Nordic Ware snob when it comes to shaped cake pans.  They are well worth the extra price, although they do occasionally turn up at discount stores like TJ Maxx, and I usually have to resist the urge to buy shapes I don't need like, say a rose-shaped bundt or a football stadium pan.

Anyhow, I thought that this batch of monkey bread was much better than last time, at least in terms of the texture of the dough.  It was also much more gooey, which was also a huge plus.  However, in terms of taste, Troy said he preferred the other dough, so I will probably go back to that recipe next time and just make it to order instead of the night before.  Still, Troy and my in-laws demolished this whole thing in no time, so I consider it a hit.

Coming up (in fact, in my oven right this moment), Chocolate-Sour Cream Bundt Cake. :)