Tuesday, May 3, 2011

Sinful Cinnamon Rolls

photo

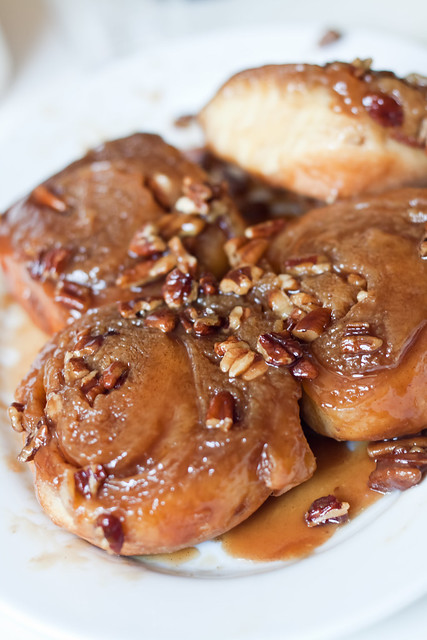
I hosted a brunch a few weeks ago and used it as an excuse to make these insanely decadent cinnamon rolls.  I don't care much for Bobby Flay, but I happened to be flipping past the Food Network one night as he was talking about the sticky buns from Flour bakery in Boston, and the food porn shots of these rolls hooked me.  When I googled for recipes, I was delighted to discover that they had the actual recipe on Food Network's website since the owner of the bakery had gone up against Flay (and won!) on his "Throwdown" show.  

I made a few slight tweaks to the FN recipe based on my own personal preference and instincts since what they mentioned on the show did not seem to identically match what was in the FN recipe or other versions I'd found online that purported to be from the Flour cookbook.  Also, I went ahead and baked up a double batch since the dough recipe was scaled that way and I had a large number of people coming over. My "doubled" version is what's below.  

Warning: this recipe is not for the feint of heart, both literally and figuratively. Not only does it use about a pound and a half of butter, but it is also pretty labor intensive, requiring at least 1 1/2-2 days of prep and rise time. It will also give your stand mixer a serious workout.

Ingredients
Brioche Dough

2 1/2 c. unbleached all-purpose flour, plus more if needed
2 1/4 c. bread flour
1 1/2 pkgs (3 1/4 teaspoons) active dry yeast 
1/3 c. plus 1 tablespoon  sugar 
1 TBSP  salt 
1/2 c. cold water 
5 eggs
1 3/8 c. (2 3/4 sticks) unsalted butter, at room temperature, cut into 10 to 12 pieces

1. Using a stand mixer fitted with the paddle, combine the all-purpose flour, bread flour, yeast, sugar, salt, water, and the eggs. Beat on low speed for 3 to 4 minutes, or until all the ingredients are combined. Stop the mixer, as needed, to scrape the sides and bottom of the bowl to make sure all the flour is incorporated into the wet ingredients. Once the dough has come together, switch to the dough hook and beat on low speed for another 3 to 4 minutes. The dough will be very stiff and seem quite dry. If your dough does not seem to want to come together, add some more cold water, a teaspoon at a time, until it does.  Don't overdo it though - it is supposed to be dry-looking at this stage.

2. With the mixer on low speed, add the butter, 1 piece at a time, mixing after each addition until it disappears into the dough. Continue mixing on low speed for about 10 minutes, stopping the mixer occasionally to scrape the sides and bottom of the bowl. It is important for all the butter to be thoroughly mixed into the dough. If necessary, stop the mixer occasionally and break up the dough with your hands to help mix in the butter.  This is greasy messy process, so an apron would be a good call here.

3. Once the butter is completely incorporated, turn up the speed to medium and beat until the dough becomes sticky, soft, and somewhat shiny, another 15 minutes. It will take some time to come together. It will look shaggy and questionable at the start and then eventually it will turn smooth and silky. 

4. Turn the speed to medium-high and beat for about 1 minute. You should hear the dough make a slap-slap-slap sound as it hits the sides of the bowl. Test the dough by pulling at it; it should stretch a bit and have a little give. If it seems wet and loose and more like a batter than a dough, add a few tablespoons of flour and mix until it comes together. If it breaks off into pieces when you pull at it, continue to mix on medium speed for another 2 to 3 minutes, or until it develops more strength and stretches when you grab it. It is ready when you can gather it all together and pick it up in 1 piece.

5. Put the dough in a large bowl or plastic container and cover it with plastic wrap, pressing the wrap directly onto the surface of the dough. Let the dough proof (that is, grow and develop flavor) in the refrigerator for at least 6 hours or up to overnight At this point you can freeze the dough in an airtight container for up to 1 week.
    Goo
    1 1/2 c. (3 sticks) unsalted butter 
    3 c. firmly packed light brown sugar 
    2/3 c. honey 
    2/3 c. heavy cream 
    2/3 c. water 
    1/2 tsp salt

    In a medium saucepan, melt the butter over medium heat. Whisk in the brown sugar and cook, stirring, to combine (it may look separated, that's ok). Remove from the heat and whisk in the honey, cream, water, and salt. Strain to remove any undissolved lumps of brown sugar. Let cool for about 30 minutes, or until cooled to room temperature. You should have about 6 cups. (The mixture can be made up to 2 weeks in advance and stored in an airtight container in the refrigerator.) 

    The rolls
    In a small bowl, combine:
    1/2 c.  light brown sugar 
    1/2 c. granulated sugar 
    2 tsp ground cinnamon 
    1 c. pecan halves, toasted and chopped
    This will be the filling for the cinnamon rolls.

    1. Take your brioche dough and divide it in half.

    2. On a floured work surface, roll out the brioche into rectangle about 12 by 16 inches and 1/4-inch thick. It will have the consistency of cold, damp Play-Doh and should be fairly easy to roll. Position the rectangle so a short side is facing you. 

    3. Sprinkle half the cinnamon/sugar mixture evenly over the entire surface of the dough. Starting from the short side farthest from you and working your way down, roll up the rectangle like a jelly roll. Try to roll tightly, so you have a nice round spiral. Trim off about 1/4- inch from each end of the roll to make them even. 

    4. Use a bench scraper or a chef's knife to cut the roll into 8 equal pieces, each about 1 1/2-inches wide. 

    5. Repeat for the other half of the dough. (At this point, the unbaked buns can be tightly wrapped in plastic wrap and frozen for up to 1 week. When ready to bake, thaw them, still wrapped, in the refrigerator overnight or at room temperature for 2 to 3 hours, then proceed as directed.) 

    6. Divide the goo between two 9 by 13-inch baking dishes, covering the bottom evenly. Sprinkle an additional 1/2 c. pecans evenly over the surface of each pan. Arrange the buns, evenly spaced, in the baking dish. Cover with plastic wrap and put in a warm spot to proof until the dough is puffy, pillowy, and soft and the buns are touching-almost tripled in size, about 2 hours. [Alternately, you can also let them proof overnight in your refrigerator, which is what they supposedly do at Flour.  I have, however, read some people's comments that they can get soggy from being in the Goo too long, so try at your own risk.]

    7. Position a rack in the center of the oven, and heat to 350 degrees F. 

    8. Bake until golden brown, about 35 to 45 minutes. Let cool in the dish on a wire rack for 20 to 30 minutes. One at a time, invert the buns onto a serving platter, and spoon any extra goo and pecans from the bottom of the dish over the top.   Makes 15 large rolls.

    The buns are best served warm or within 4 hours of baking. They can be stored in an airtight container at room temperature for up to 1 day, and then warmed in a 325 degree F oven for 10 to 12 minutes before serving. 

    The Verdict
    As I mentioned before, these are pretty labor intensive.  Being the procrastinator that I am, I waited way too long to start these - like at 11pm on Saturday night with the intention of serving them at 11am on Sunday.  Not the best idea, especially since mixing the dough was a long and somewhat loud process and I had to babysit my mixer to keep it from jumping off the counter.  

    So yes, it was a time crunch, and they were a bit late to the table, but these cinnamon rolls were TO. DIE. FOR. Like, everyone-was-stuffed-full-and-still-had-to-eat-some-scrumptious.  I did realize too late that I had rolled mine along the long side instead of the short, so mine were tall instead of wide and a bit misshapen, but they were still fantastic.  I love nuts, so I think I may double the pecans next time.  

    Other random notes
    I was a bit short, so I subbed agave nectar for about half of the honey.  I found the goo to be surprisingly thin, which was nice in that I didn't have to strain it, but made it less satisfyingly gooey. I may cut back on the water next time, or allow it to cool overnight in the fridge to see if it thickens up more.  Not sure if using the agave nectar factored into the thinness or not.

    I also used two disposable aluminum pans for the final proof and baking.  This was initially out of necessity, since my glass baking dishes were being used for other brunch items, but turned out to be a blessing in disguise as it meant I avoided having to scrub baked-on goo out of my pans.  

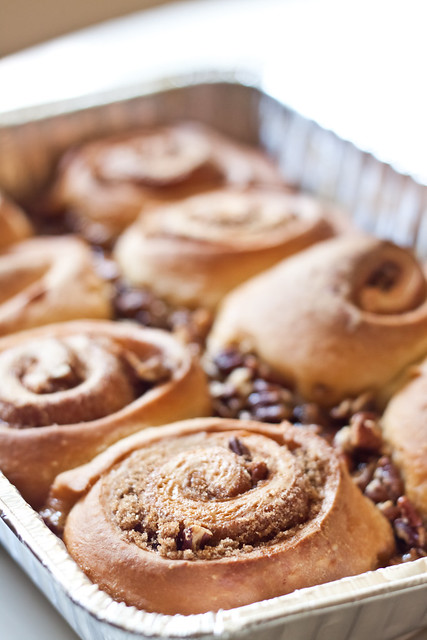
    Here's a pic of the rolls before I turned them out of the pan.
    photo 

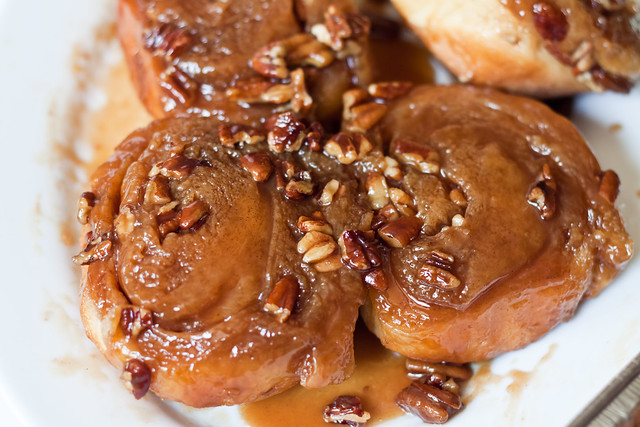
    And after. Yum.
    photo

    As I said before, this made 16 giant rolls, and while they were tasty, they are not the type of thing you want to eat a lot of. I packed most of the leftovers up and sent them home with our guests, and T declared that these were so good they should only be made once or twice a year.  I will probably bust them out again at Christmas.

      Sunday, April 24, 2011

      Pizza Night

      photo
      Yikes, 2 1/2 months since my last post. What can I say, except that life has kept me busy these last few months?  I am, however, making a new resolution to be better about keeping up with all of my various blogs.  No, really. I mean it this time. 

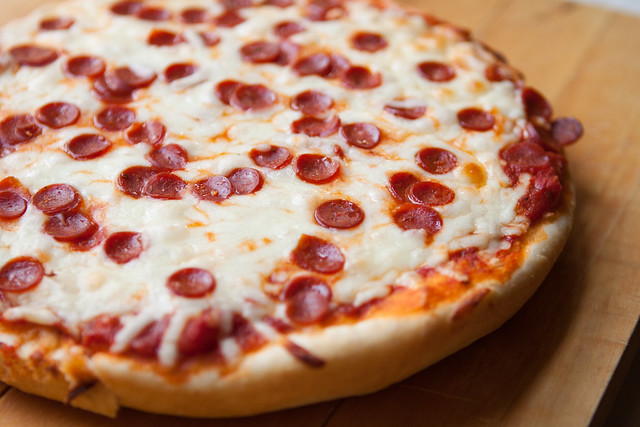
      About once or twice a month, usually on a Friday, we have homemade pizza night.  It's great fun and everyone is always happy since they get to put on (or leave off) whatever toppings they want.  We've been doing it for years now, and have the process down to the point where we pretty much never order delivery anymore.  Not to toot my own horn or anything, but I make a damn fine pizza. ;)

      I usually make thin-crust pizzas on a pizza stone, but I've been wanting to give the pan pizza recipe from America's Test Kitchen a try for some time now.  Of course, I'm too cheap to pay for a subscription to their website (especially since I already own one of their cookbooks), so a simple Google search brought me to a copy of the recipe on this blog.

      Confession time: the hubs and I are big eaters.  Ok, we're pigs, especially when it comes to pizza.  Even our 4-year-old daughter has been known to devour four or five adult-sized slices of restaurant/delivery pizza.  When I read that this recipe made two pizzas which would feed 4-6 people, I was a bit skeptical that this would be enough food for the three of us since the individual ones we normally make are much bigger than 9 inches.  Also, over the years, we have each become more firmly ensconced in our individual tastes.  Troy is big on pepperoni. I love sausage and mushrooms. The kiddo does not like veggies of any kind.  I knew that if we didn't each have our own pizza, there would be issues. So I doubled the recipe to make 4 pizzas.  Yeah, in retrospect, it was a little bit crazy.  Here's the doubled recipe, with a few other minor changes from the original.

      Pan Pizza
      Dough Ingredients
      3/4 c. olive oil, divided
      1 3/4 c. skim milk, warmed to 110 degrees
      4 tsp sugar
      4 2/3 c. all-purpose flour, plus extra for counter
      2 pkgs (or 4 1/2 tsp) instant yeast
      1 tsp table salt

      Toppings
      3 c. tomato sauce
      6 c. shredded part-skim mozzarella cheese
      pepperoni, sausage, bell peppers, onions, etc.

      1. Adjust oven rack to lowest position and preheat oven to 200 degrees. When oven reaches 200 degrees, turn it off. 

      2. Combine warm milk, sugar and 1/4 c. olive oil in measuring cup. 

      3. In the bowl of stand mixer, combine flour, yeast, and salt with dough hook. Turn machine to low and slowly add milk mixture. Once the dough comes together, increase speed to medium and mix until dough is shiny and smooth, about 5-10 min.  [If the dough does not want to come together (this can vary depending on weather, humidity, etc.), add a little water, a teaspoon at a time until it starts to form a ball.]  My dough was very stiff and not as smooth as I would have liked, but I just went ahead with it after 10 minutes of kneading.

      4. Turn dough onto lightly floured counter, and gently shape into ball.  Lightly grease a large bowl with cooking spray (I just re-use the mixer bowl) and place dough in greased bowl. Cover with plastic wrap and place in warm oven until doubled in size, about 30 min.

      5. Coat each of four 9-inch cake pans with 2 TB of oil. [I cut this down from the three tablespoons in the original recipe since 2 seemed to coat the pan just fine.]

      6. Transfer dough to lightly floured counter, divide in 4 pieces, and lightly roll each half into ball. Working with 1 dough ball at a time, roll and shape dough into 9 ½ inch round and press into oiled pan. Cover with plastic wrap and set in warm spot (not in oven) until puffy and slightly risen, about 20 minutes. 

      7. Preheat oven to 400 degrees.

      8. Remove plastic wrap from dough. Ladle approximately ⅔ c. sauce on each round, leaving ½ inch border around edges. Sprinkle each with about 1 ½ c. cheese and add your desired toppings. * I

      9. Bake until cheese is melted and starting to brown around edges, about 20 minutes. Remove from oven; let pizzas rest in pans for 1 minute. Using spatula, transfer pizzas to cutting board and cut each into 8 wedges. Serve.

      *The original America's Test Kitchen recipe was for pepperoni pizza, and they recommended you microwave the pepperoni on a paper towel first to render out some of the fat to keep the top of your pizza from getting greasy.  Troy and the kiddo used mini turkey pepperonis, which didn't have quite as much oil, so we skipped that step.  I used turkey Italian sausage, which I browned in a pan first.  I also added a ton of mushrooms and some caramelized onions to my pizza, but I was worried they'd dry out, so I put them under the cheese.

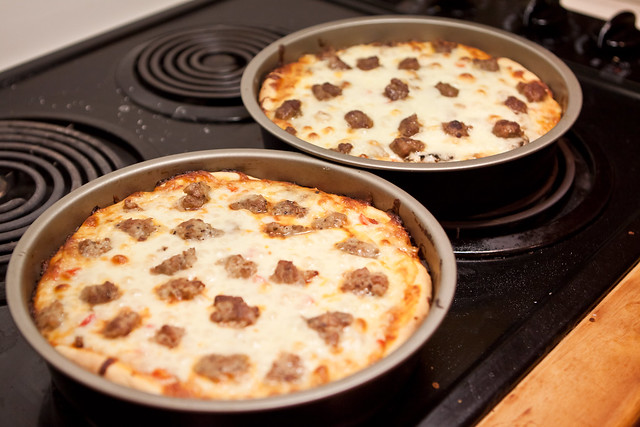
      I cooked up three pizzas and put the remaining dough ball in the fridge for tomorrow.  I'll update with how it held up when I get the chance.  

      photo
       
      The Verdict
      All three pizzas were excellent. Very different from our usual, but in a good way.  The crust was lovely: thick and soft and chewy.  My only minor complaint was that it was a teeny bit on the bland side, so next time I will likely season it with a little salt after shaping it in the pan. I liked that with the thicker crust and the pan, we could really load the pizzas up with sauce and toppings, compared to what we normally make, so that was also a nice change.  The biggest bonus was that I could cook all three at once, whereas I'd previously been limited to one pizza per stone.  

      Oh and the portion size? Well, I definitely underestimated how filling the crust would be.  The kiddo ate about 1/4 (or 2 slices) of her pizza.  I ate about half of mine.  Troy (who was starving by the time they came out of the oven) managed to completely polish his off, but I think he probably hurt himself in the process. 

      I really like that I can start making the dough for this as late as 4pm and still be ready to eat by 6. I'll definitely be working these into the rotation. 

      Edited to add:
      I made another pizza with the leftover dough last night and was very pleased with the results.  Because the dough was so cold when I took it out of the fridge, it didn't rise as much after putting it in the pan, but I kind of preferred it this way since it meant the crust did not end up as thick, and I had more room for toppings.  I rolled it big enough to have crust going up the sides of the pan, which again, made the crust thinner overall. In homage to my Chicago roots, I filled it more like a deep dish pizza, using some chunky homemade tomato sauce (with meat) and frozen spinach that had been defrosted and squeezed to remove excess water.  It was no Giordano's, but it turned out pretty dang good.  Now I'm thinking I need to try deep dish next. ;)

      Thursday, February 3, 2011

      Snow Day

       On Tuesday, we had a normally rare snow day due to the freezing rain/sleet the night before, followed by freezing temperatures which resulted in the roads turning into solid sheets of ice.  Being from the Midwest, this type of thing never used to phase me, but since they don't have salt trucks down here (and barely even have sand), it makes driving pretty hazardous.  So E and I took advantage of the lazy day at home to hang out, do some craft projects and bake!

      photo

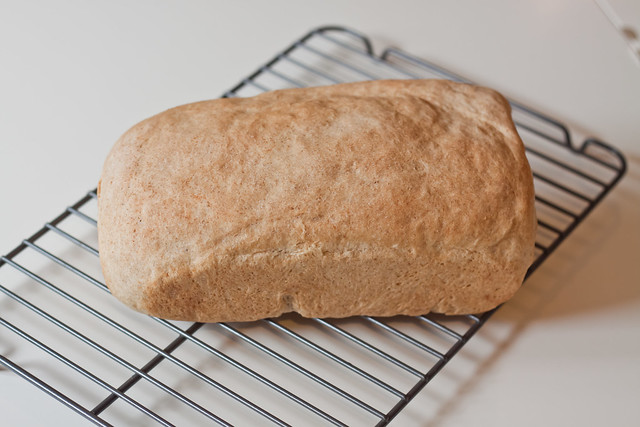
      First, I made my friend Jacki's super yummy bread recipe.  Basically, you toss all the ingredients into a bread machine and let it mix and rise, but then take it out to form it into loaves and bake it in your regular oven.  Works like a charm and it's a great, no-fuss no-muss way to have freshly baked bread almost anytime.  I bought a cheap used bread machine pretty much just for this purpose. 

      One minor change I make: since I substitute slightly less than half the white flour for whole wheat, I've found that it tends to rise a bit less than I'd like, so I compensate by increasing the yeast to 1 full tablespoon.  Both Troy and the kiddo go crazy for this bread whenever I make it and usually we manage to plow through an entire loaf in less than a day.  Luckily, the recipe makes enough dough for 2 loaves. ;)


      photo 

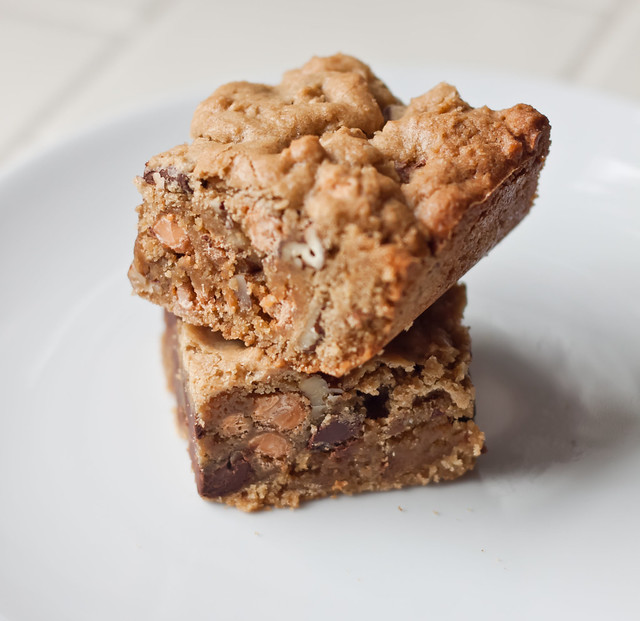
      After the bread was done, I let E help me mix up a batch of Congo Bars from Bakerella's website.  As per her recommendation, we mixed them completely by hand, but I'm not sure it made much of a difference in the texture since they came out so underbaked, even after I added about 5 minutes to the bake time. I think next time I will bake them for longer at a lower temperature.  
       
      Even underbaked, they are still sinfully good and so easy to make with ingredients I keep on hand. I added a cup of butterscotch chips, just because I had them handy, and it might have been a bit over the top since they are already so sweet.  I may also try cutting the sugar next time by a couple ounces and see what happens.

      Wednesday, January 19, 2011

      Cranberry Oatmeal Cookies

      photo


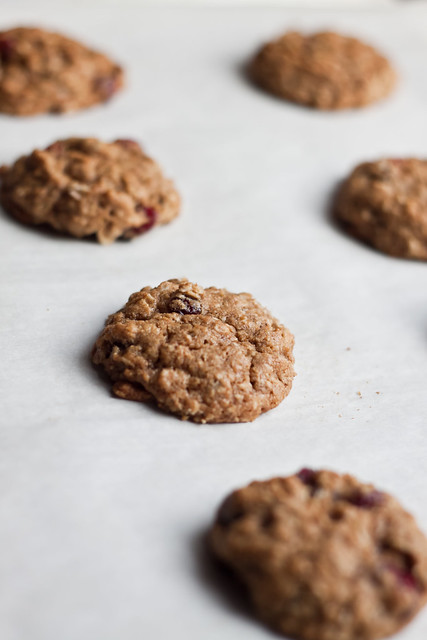
      Last month, I had a few friends over for an impromptu knitting night, and I used that as an excuse to bake up some cookies.  Here's my version of a cranberry oatmeal cookie, adapted from an Allrecipes recipe.  I like this recipe because it's a bit more heavily spiced than your average oatmeal cookie, so it's especially good around the holidays.  I used cranberries because I hate raisins, but you could easily swap them out.  I did think these were a tad sweet the last time I made them, so I will likely cut out at least 1/4 c. of the brown sugar for a slightly milder cookie.
       
      Ingredients

      1 c. (2 sticks) unsalted butter
      1 c. packed brown sugar
      1/2 c. granulated sugar
      2 eggs
      1 tsp vanilla extract
      1 c. all-purpose flour
      1/2 c. whole wheat flour
      1 tsp baking soda
      1/2 tsp salt
      2 tsp ground cinnamon
      1/2 tsp ground cloves
      3 c. rolled oats
      1 c. dried cranberries

      Directions

      1. Preheat oven to 350 degrees.

      2. In a small bowl, combine both flours, baking soda, salt cinnamon and cloves. 

      3. In your mixer bowl, cream butter and both sugars together until light and fluffy.

      4. Add eggs, one at a time, scraping down the bowl in-between each addition.  Add vanilla and combine.

      5. Add flour mixture and mix on low until just combined.

      6. Add oats and cranberries and stir to combine.

      7.  Drop rounded tablespoons onto a parchment-lined cookie sheet.  Bake 10-12 minutes or until golden around the edges.  Do not overbake.  Allow to cool on cookie sheet for about 2 minutes before transferring to cooling rack. 

      I can't quite remember since it's been a while, but I think this makes about 4 dozen cookies.

      Thursday, June 17, 2010

      Weekend breakfast

      When I was a kid, my mom used to occasionally make crepes for the family on weekends.  I never thought it was unusual until we had guests who "oohed and aahhed" over such a fancy breakfast.  But crepes really aren't all that hard to make.  It's more or less the same as pancakes, you just cook them one at a time in a smaller pan.  I'd say the hardest part is waiting the 30 minutes for the batter to rest.  With Father's Day coming up, I figured what better way to show your appreciation than to give him a special fancy breakfast. ;)

      Here is the  recipe I used for the batter, from Crepes, Waffles & Pancakes! by Kathryn Hawkins:

      Basic Crepe Batter
      Makes 12 crepes

      Ingredients
      1 c. plain flour
      2 Tbsp. extra-fine sugar (optional)
      1 pinch salt
      2 whole eggs
      2 egg yolks
      1 1/4 c. milk
      1/3 c. unsalted butter, melted

      Directions
      1. Combine the flour, sugar  (if using), and salt in a bowl.  Make a well in the center, break in the eggs, then add the extra yolks.  Add half the milk and gradually work into the flour using a whisk.  Beat lightly until smooth, but don't over-mix.

      2. Add the remaining milk gradually, whisking gently until it is well combined.  Transfer to a batter bowl, cover loosely and leave in a cool place for 30 min.  Stir 1/4 c. melted butter into the batter before using.

      3. Lightly brush a small frying pan (6-inch diameter) with a little of the remaining butter and heat until hot.  Holding the pan, pour in about 1/4 c. batter and tilt the pan from side to side so that thte batter runs into a thin, even layer across the bottom of the pan.

      4. Place the pan over moderate heat and cook for about 1 minute or until the crepe browns around the edges and begins to curl away from the pan.  Slide a palette knife under the crepe and flip it over.  Brown the underside for a further minute.

      5. Turn out onto a wire rack lined with a clean tea towel and baking parchment.  Fold the paper and towel over the crepe to keep it moist.  Continue to make further crepes, brushing the pan with melted butter as necessary, gently stirring the batter each time it is used, and stacking the cooked crepes between sheets of parchment until you are ready to serve.

      My Notes
      I did not bother with extra-fine sugar.  I used regular granulated and it seemed to work out just fine.  I also think that they took a bit longer than a minute for each side.  Oh and this made closer to 14 or 15 for me, but I probably could have made them bigger.

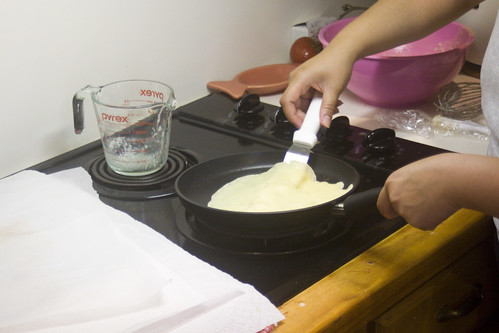
      I got a fancypants crepe pan for Christmas last year, but any small nonstick pan will work just as well.  I also used a large offset spatula to lift and flip the crepes.  I found that was a bit easier to use than a regular wide spatula.

       To keep them warm, I stacked them on a plate in the oven with layers of parchment in between and a clean tea towel over the top.

      IMG_1449 by you. 
      IMG_1452 by you.


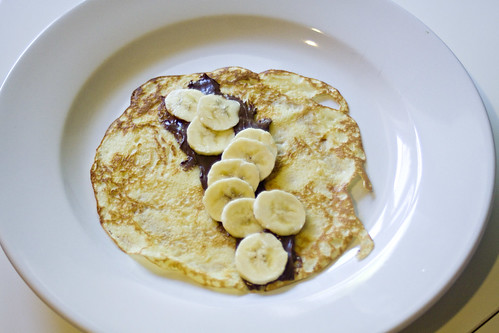
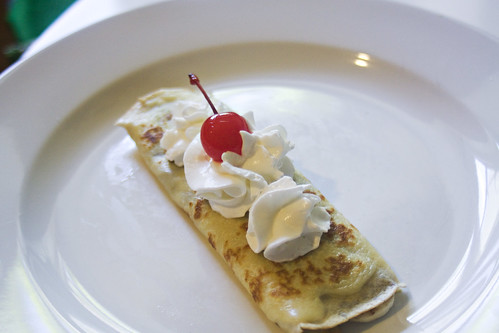
      The thing I loved the most about crepes is that you can set up an assembly line of fillings and everyone can make their own.  You can do savory or sweet, healthy or not-so-healthy, fancy or plain. ;)  I set out everything from bananas and nutella (my fave) to crushed pineapple and whipped cream to just plain old strawberry jam.

      IMG_1436 by you. 
      IMG_1438 by you. 

      I thought I was going to have enough leftover to try to make Crepes Suzette later, but these were all gobbled up in one sitting!

      Friday, May 14, 2010

      Shameless plug

      Sorry for the lack of posts lately.  I've been busier than usual as of late.  But I promise I have a great weekend breakfast/brunch post coming up soon!  In the meantime, here's a link to a guest blog I wrote for Momtrends.  It includes my world-famous recipe for "Kitchen Sink Cookies."  Ok, maybe not world-famous, but they're pretty famous in our household.  Troy has declared them his favorite cookies ever, which is high praise coming from someone who likes cookies as much as he does. 

      If you enjoy the post, please leave a comment! ;)

      Sunday, April 11, 2010

      Abacus

      Yikes, has it really been almost 2 months since my last post?  Sincere apologies, as the month of March was a bit crazy, and then, well...I guess I just got a bit lazy about catching up.  To make up for it, here's another restaurant review.

      For my birthday last month, Troy took me to Abacus for dinner.  We've always heard fabulous things about it but had yet to go there, so I was very excited to try it. 

      We got there early so that we could relax and have a drink at the bar.  Troy had the "Big Daddy" martini and I had the pear martini, which was fabulous.  Sweet and tart, but not too much so.  I think I could have easily drank 2-3 or them.  But I downed that first one a little too quickly and opted against another for fear of being too drunk to enjoy my food. 

      After Troy made the reservation, I had perused their sample menu online and was pretty certain that I wanted to do the 9-course tasting menu.  A bunch of friends had raved to me about the lobster shooters there, which I really wanted to try, but ultimately, we decided against it because we knew it was just going to be too much food.

      Normally, I feel too self-conscious to take pictures, and I also don't like having to disrupt our meal and conversation either.  But for some reason, I decided to bring my camera this time, just in case I felt like using it.  I used my 50mm lens, because it was the smallest and also because  I refuse to use flash in those situation.   I just quickly snapped one photo of each course before digging in.  So some of these may be dark, slightly out-of-focus, etc.  Sorry.

      Troy and I both really liked the ambiance there: modern without being too trendy and weird, and not so loud you couldn't have a conversation.   Each table was individually lit so you could see your food (I hate eating in the dark), but the room wasn't so bright overall as to be overwhelming.  It had a nice sense of privacy, but then, we did sit in the corner, so not sure what it would have been like sitting elsewhere.

      So as I mentioned above, we opted for the nine-course tasting menu.  Many were mini versions of menu items.

      No amuse bouche, which I left me a little disappointed. :(

      IMG_1227 by you.
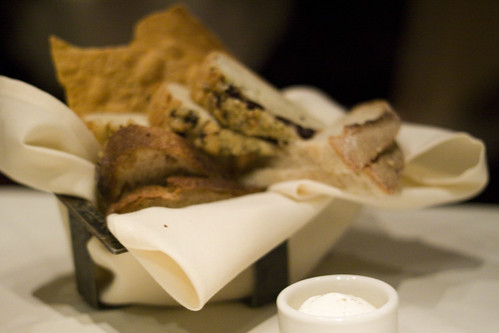
      Artisan bread basket - rosemary olive foccacia, apricot wheat(?) bread, sourdough, mini biscuits, and what I think were cayenne flatbread crisps or crackers.  Clearly made in-house.  Or if it wasn't, I want to know where they bought it all because it was fabulous.  I'm not normally a fan of olives, but they were really delicious chopped up on top of the foccacia.  The only real miss for me were the mini-biscuits, which were a bit bland and seemed like they didn't really belong there.  Pretty sure the butter was homemade as well.

      1st course: Tuna tataki in ginger-scallion ponzu sauce
       IMG_1226 by you.
      Lightly seared tuna, totally rare inside, thinly sliced and arranged in a circle.  The sauce was beautiful - perfectly salty and tangy and just the right amount of ginger - and really complimented the flavor of the tuna.  One of our favorite dishes of the evening.

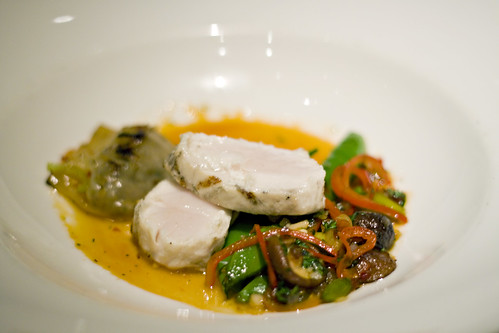
      2nd course: Hawaiian walu fish in chili lemongrass sauce/broth with Kobe beef mini-dumpling, baby shitake mushrooms, sugar snap peas, & red peppers
      IMG_1228 by you.
      Troy and I thought this was the best dish of the evening.  The fish was cooked absolutely perfectly, the veggies were a good complement, and the sauce was amazing - tangy & slightly spicy.  I thought the Kobe dumpling was a bit of an odd addition since the richness of the beef threw off the lightness of everything else.  Troy didn't have a problem with it.

      3rd course: King salmon on pepper jack grits with jicama slaw, pepita pesto and cayenne tomato butter sauce
      IMG_1229 by you.
      This was also excellent.  Again, the fish was cooked perfectly.  I thought the cheesy grits would be weird with the salmon, but the flavor wasn't so overwhelming and I liked the contrast of textures.  I also liked that the slaw had strips of tortilla chips in them, which gave ti a nice crunch. 

      4th course - Sangria sorbet with a golden raspberry (forgive the extreme lack of focus)
      IMG_1230 by you.
      I thought this was a bit of cheat, calling a palate cleanser the fourth course.   The flavor was nice, very much like sangria, although it was a little bit sweet for my taste, especially after being dusted with powdered sugar.  Also I hate to nitpick, but the texture was a lot rougher than what I'd expect from a sorbet.  I'm not sure if the runner who served this mis-spoke or not, but I'd say it was more like granita.

      5th course: Seared foie gras over duck confit blintz with madagascar vanilla sauce
      IMG_1231 by you.
      This was my other favorite dish of the night.  The foie gras had a gorgeous seared crust to it which really gave it a nice texture.  I was a bit wary about the vanilla sauce since I generally feel like vanilla belongs in dessert, but it actually went nicely with the richness of the foie.  There was another flavor in the sauce that I couldn't quite make out.  I thought it was pear, but it turned out to be granny smith apple!  The duck blintz was also very good, but I thought it didn't go as well with the sauce.

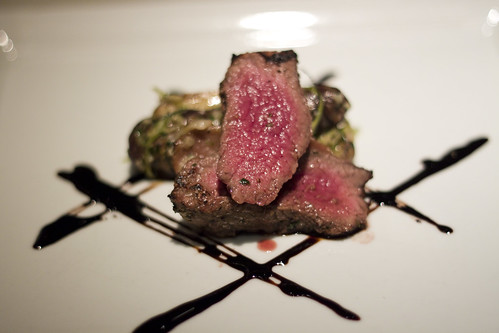
      6th course: Venison with butter poached potatoes, pearl onions and duck(?) confit
      IMG_1232 by you.
      On this dish, my memory has failed me a bit.  This had a lovely sauce on it, but I cannot for the life of me remember the description.  I want to say it taste like some kind of wine reduction, but I could swear that the server said something about cherries.  Also, I'm fairly certain that he also told us this had duck confit, however the version on the menu said rabbit.  We weren't entirely sure, even as we were eating it. 

      Again, this was beautifully cooked.  I can't say there was anything wrong with this dish, but it didn't really knock my socks off and make me want to lick my plate.  The butter-poached potatoes were probably my favorite part.  Also, they were a little inconsistent in plating as I had WAY more confit on my plate than Troy.  I think he also had cherry tomatoes on his plate, and I did not.

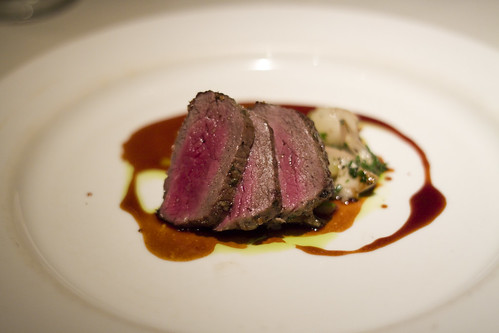
      7th course: Antelope with Gorgonzola fingerling potatoes, demi glace sauce
      IMG_1233 by you.
      I loved the gaminess of the meat, and the contrast of the sauce to cut the richness, but the potatoes were weird.  I absolutely hated the gorgonzola - it was way too overpowering.  I also found it odd that each of my three potatoes was different.  I'm not sure what I was supposed to get out of that.


      8th course - cheese course
      IMG_1234 by you.
      Again, apologies for my failure to write down the names of all the cheeses.  Basically, the only one I really remember is the semi-soft pictured to the left was a Chimay.  On the right was an aged cheddar, and in the center, a blue cheese.  The cheeses were served with a small tumbler of wildflower honey, quince gelee, spiced nuts, artisan bread crisps, and thin slices of apple.

      I really enjoyed this course.  All of the cheeses were quite different and delicious.  I also really liked the cubes of quince gelee.  I do wish there were a few more bread crisps though.

      9th course - Dessert
       IMG_1237 by you.
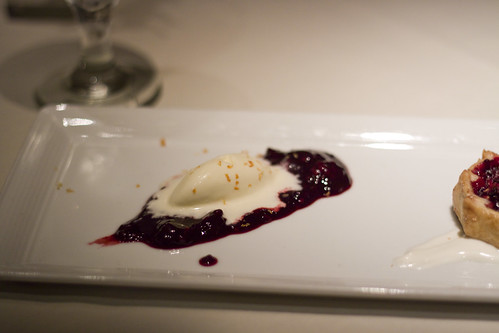
      Berry galette with goat cheese crema and lemon curd ice cream over mixed berry sauce
      We were told this was a bit off the usual tasting menu; apparently these was made as testers for a dessert special but were too small, so they gave them to us instead of the nutella & kitkat concotion we were supposed to get.  I was very glad for it.


      I loved the galette, especially with eaten in conjunction with the goat cheese crema underneath.  In fact, I wish there had been a little bit more of that.  The ice cream also very good but was already almost totally melted when it was served. :(

      IMG_1235 by you. 

      All-in-all, this was a very good meal that fell just short of being great.  I felt like every dish had one element that just didn't belong there, like the beef dumpling, or the Gorgonzola cheese.  Troy says I'm overcritical, but my big hangup is that everything should all taste good together.  So if you put a bunch of different items together on one plate, I should be able to put a little bit of each item on my fork, take one bite and not be like, heh? Is that too much to ask?  

      I was a little bit surprised that with all the sushi on the menu, there wasn't any sushi as part of the tasting menu.  However, I will say that the seafood courses were far and away the strongest part of the menu.  

      They do have happy hour specials, so I'd definitely like to go back sometime to hang out at the bar and nibble on appetizers.